Monday, June 8, 2015

Passing down the skills

My daughter wanted one of those cute jumpsuits everyone is wearing right now. Unfortunately, the shorts are always too short. It's like they think our girls need to wear shorty shorts everywhere they go. So, of course, being the sewing Mamma I am, I suggested she make one that we can tailor to her needs. She liked that idea, so she chose a pattern at Hancock Fabrics during one of their pattern sales. (Pattern sales are pretty much the only time I buy patterns, unless absolutely necessary.) 

After choosing her pattern, she chose a beautiful coral crepe material.

She loves the Project Runway patterns. This one is 1158, from Simplicity. She likes these because they come with a design page in the pattern.

She can choose which sleeve, which bodice, and which pant she wants. It also makes it super easy to customize the pattern to get exactly what she wants.

So, after laundering the material she set out to get her pattern pieces ready. Once that was done it was time to cut. She had a little trouble understanding the cutting lay out and the importance of fabric grain. So I explained it. Following the grain of the material ensures the drape, ease, and stretch of the fabric match up and helps make sure everything hangs or drapes properly. It also helps in avoiding puckering when sewing.

Here she is after her fabric grain and cutting layout lesson. She got the idea and decided I might know a little bit about sewing. So, she decided to follow my advice and it turned out OK.

We took advantage of the borrowed dressform and pieced the bodice on there as we went along.

Other than a few broken needles and an instance of seam ripping, she did well. I did step in a few times to help when she got a needle stuck and when the waistband wouldn't cooperate, but she did it herself.

When she was finished it all came out beautifully! The color and design look great on her, and we were able to lengthen the shorts to allow for a more modest design.


She received plenty of compliments at school, as well as surprise that she made it herself. I am one proud Mamma!


Sunday, May 31, 2015

Summer dress and first time

So, I wanted to make a cute summer dress for my missionary daughter who is currently serving in Virginia. Since she is in Virginia fitting the dress to her was going to be a challenge. This means I need to have my first time.....using a dressform. I consulted my friends and found one with a small dressform she was willing to let me use. (Thanks Amy!)

So, with pattern, fabric, measurements, and now dressform ready, I started in on the dress. When I say fitting my daughter would be a challenge, I mean lots of alterations are usually needed. She has a very tiny waist, but has been blessed in, ummm, other areas. We will say she is curvy, thin, and short. 

I decided on using a McCall pattern I have had for a long time. Very simple to pull together and very versatile depending on what you decide to make it out of. 

Once I decided on the pattern I found a cute, summery, but not floral fabric.

Once I had everything cut out I started adjustments on the dressform. Putting the hips and waist on the smallest setting, and adjusting the bust accordingly I saw I would need to adjust all the darts by about 1 inch more to bring the waist in so the dress would not hang like a sack. Once I had alterations marked I started assembling. And this dress comes together so fast! By fast I mean, I got it put together with the exception of sleeves and hem in 2 hours. Yes, I am an experienced sewer, but I believe even a novice could do this dress in a day.

Here is the dress before sleeves and hem.

As you can see, I had a bright pink piping to the collar.

I finished up the following day by adding in the sleeves, hemming, and putting in the hook and eye.


I added piping to sleeves as well for a finished look. All in all I love the way this dress came out, and I can't wait for pictures of my sweet missionary in it.


***pattern McCall 2401, fabric from Joann's


Friday, April 10, 2015

Prom corsage

So, I didn't exactly take pictures through out the process, but I made the corsage for my son's date for prom tonight. We bought our supplies at Michael's. She wanted a wrist corsage, so we started with a pearl wrist corsage base that you can find in the wedding accessory section. I added a nice variegated, sparkly, wide ribbon followed by a gold sheer ribbon. Then I added the small white flowers. I placed the large flower in the middle of all of that and added ribbons between the petals and the butterfly clip to a top petal. 

I will say, this was not the first attempt. I had actually put it all together, looked at it, hated it, then pulled it apart. Thankfully I worked fast enough that most of the hot glue had not completely hardened. It was easier to pull apart that way.

So, after a first failed attempt I created this, which my son thinks is perfect for his date. I hope she agrees.


Just as a side note, the large flower came colored that way. I did not dye or paint anything. 

Sunday, April 5, 2015

McCalls Wrap Dress Sew Along


I love participating in Sew Alongs. I love wrap dresses. So this sew along from McCall was perfect for me. I could get tips and tricks from other sewing enthusiasts, and wrap dresses are so flattering for so many people. They help me hide a little pooch in the belly but still look good. So, as soon as I saw the invitation to join I was in. I started perusing the McCall, Butterick, and Vogue patterns online and watching the mailers from my local Joann and Hancock stores for pattern sales. I found one I loved.
I chose McCall 6884. 

As you can see, a fairly simple pattern, but that gathering at the waist will help with hiding the afore mentioned pooch.

Now that I had my pattern, I started searching for fabric. I love to search online and get a general idea of what I like, then see if it is available in the store. I don't like ordering fabric online unless I have seen it in person first. So, usually after searching online I just buy at the store. I did find a fabric I liked at Joann.com and saw that it was available at one of my local stores. I am very lucky in that I have 4 different Joann stores and 2 Hancock Fabric stores all within 25 minutes of my home. Here is the fabric I chose. 

So, I have my pattern, I have my fabric, and eventually I had the time to get started.


Always read your pattern instructions thoroughly before starting. Nothing is worse than cutting into the perfect fabric only to realize you screwed up. (I speak from experience) Anyway, after reading through the cutting instructions and making sure I had all my pattern pieces together, I started cutting out. I was able to cut all the pieces fairly easily, but I did use a hint I read from the sew along. Never let the fabric hang off the end of your table as it will stretch and distort the fabric as you cut. I would not have thought of that. 

After getting everything cut out my free time was used up. I had to wait a little while (read two weeks) before I could start sewing my dress. Hey, I have two teenagers at home, a missionary half way across the country, a husband, a full time job, and a wicked Pinterest habit. LOL So, I started sewing, and was able to finish it in one weekend. I used my server to make nice finished edges. 


I also used it to make sewing a narrow gem easier. After serving the edge I simply double folded the edge and came out with a lovely narrow hem with no hassle.

This is the sleeve edge. It is very easy to do and looks great.

 I love the way it turned out. However, being a short, slightly busty girl who doesn't like to show her cleavage, I wish I would have adjusted the front of the wrap to give me better coverage. That is an adjustment I will make before using this pattern again. But for this dress and cami with a nice lacy edge works well. I did lengthen the dress by 3 inches as I wanted it to come below my knee.


Here is the dress hanging and tied on the side.


A close up of the side tie. And here is the dress on me. 


I am very happy with this dress and can't wait to wear it to church. I know it will be a huge hit with all the ladies who admire my sewing skills. Now, I'm just waiting for the next sew along. In the meantime, I'll be working on more spring skirts and dresses for my girls and a prom corsage for my son's date. Stay tuned.


Friday, March 6, 2015

Sewing for my missionary

So, my oldest daughter is currently serving a mission for our church in West Virginia/Virginia area. She took plenty of warm winter clothes with her, but before she left she picked out some spring time fabrics she wanted made into some cute spring and summer outfits out of. As luck would have it, a week or so ago, Texas had a freaky weather time and I ended up with a day off of work where I had nothing to do but sit at home and sew. In otherwise, a perfect day! :)

I started out with the skirt, which she had chosen a purple sateen cotton with an aqua/tealish sateen cotton for accent. She had chosen McCall 5591 for her skirt. I always try to buy my patterns when Joann or Hancock has them on sale for $1.99 or less. This is a big help since patterns can get expensive. The fabric was purchased on sale and with a coupon, so still more savings.

null

 This is the Sew Classic Bottomweight Stretch Sateen that we used. It was so easy to work with!
 
M5591, Misses' Skirts and Sash
This is the pattern I used and she chose to combine the pleats of View C with the waistband of View B. The pleats actually come together very easily. They are wide and the pattern clearly explains how to berng them together.
 
Once I had the skirt together I was able to start on the shirt. For the shirt she chose McCall 6035. She chose a light weight cotton from the Keepsake Calicos at Joann.

M6035, Misses' Shirts
This is the pattern she chose. She chose the short sleeved version.
 
I tried to find a swatch of the fabric, but apparently it is sold out or something. But I can tell you that this shirt came together so fast. The key I found was to make sure you clip the curves, as there are several, which makes everything lay nicely as you sew. It also makes it fit better and gives a better appearance. I chose to use purple translucent buttons for the front of the shirt to bring out the purple butterflies in the print.
 
Here is the finished project. My younger daughter was gracious enough to model it for me as her sister is across the country.


Here is the skirt on the hanger. I love the pop of color from the aqua/tealish sash.

 
The blouse in production. This was before the sleeves and collar.

 
 I will be shipping this out to her soon and can not wait to hear how much she loves it!!!

Saturday, April 19, 2014

Sewing in the Spring...Love it!

I love springtime. I love the beautiful flowers, the sometimes sunny skies, the occasional spring storms, but I also love all the new fabrics that come out as well. I love going through the fabric store and seeing all the beautiful colors and flowey fabrics and thinking of all the dresses, skirts, and outfits I can make with them. I get excited finding the right pattern for the right fabric and getting ready to see the finished project. With a teenage daughter the most fun thing to look forward to sewing is her prom dress. This year was Senior prom. The last big dance before she graduates and is off into the world. (sigh, tear, sniff) My daughter loves looking at the patterns and figuring out her dress as much as I do. This year we decided on a McCall pattern for her dress.

She loved the three tiered skirt with the sheer bodice overlay. So, like I always do for patterns, I waited patiently for the pattern sale at Joanns and bought it when it was $1.99 a pattern. To me that is the only time to buy patterns. Why pay $18 or more for a pattern. Part of the reason I sew my own clothes is to save money on them, not spend a boat load on a pattern.

     Once we had the pattern picked out it was time to decide on the fabric. She had originally wanted to use a Casa Collection color from Joanns called wisteria, but alas, it had been discontinued and there was none of it left in the entire city. Go figure. She was determined to have a lilac overlay with a black satin underlining. So we started searching clearance sections, scouring through all of the special occasion fabrics until we got lucky There was a clearance fabric at Joanns that was a sheer lilac with butterflies imprinted and a tiny swiss dots all over.

 
PERFECT!


     So with our overlay in hand and the black Casa Collection satin for underneath, we went to the cutting counter. Now, let me tell you, the fabric was obviously meant to be hers. When the measured it out, there was just barely enough to meet what we needed for our pattern. Phew, I held my breath the whole time she was measuring. After we had our fabric, we also needed boning and a "14 inch invisible zipper. Not to mention the thread to match. Thread was an easy one. I sew a lot with these colors so I already had some at home.  So, with our goodies in hand we headed home to begin our project. Normally, I wash fabrics before I sew with them, but with these fabrics I just ironed them on a steam setting instead.

     I began by unfolding the pattern, which had a really cool, wannabe fashion designer page to it so you can plan out what you want to make based on the bodice and skirt options included.

 
*One note with this type of pattern. In order to find out exactly how much yardage you need you have to open the pattern and look at directions. The entire yardage is not listed on the pattern package. Neither are all of the notions.
 
 
     This is a really neat feature if you aren't quite sure what you want to do but love the look of the pattern. Thankfully, she already knew what she wanted. I set out to cutting the pattern pieces and pinning them so I could get everything ready to start sewing. Now, please do not believe this all happened in one day. I am a Mom to 3 teenagers, and a Wife to a busy husband. I work part time for a doctor and I go to school full time as well for nursing. Needless to say, this all occurred over several days if not weeks. Anyway, pinning and cutting ensued until we had everything ready to start assembling.


As we started assembly I realized my daughter is a bit of a skinny mini. (Not sure where that came from, wish it was me) and I had to alter the top to fit. I had to allow for the bust, but the waist section had to be taken in. No problem, I simply used the sections at the back where the back of the bodice meets and took the unneeded fabric out there. I HIGHLY recommend fitting to the person you are sewing for before you begin sewing. After all, that is what pins are for.
 
    I did get a little detour in the road as we neared prom. A friend called and had a prom emergency for her daughter and her daughter's friend for their prom which was a week before my daughter's. Their dresses needed hemmed and the lady who was going to do it fell off a ladder. Hmmm, guess she wasn't going to be able to do the alterations. So, I took two evening and altered their dresses before proceeding on my daughter's.
 
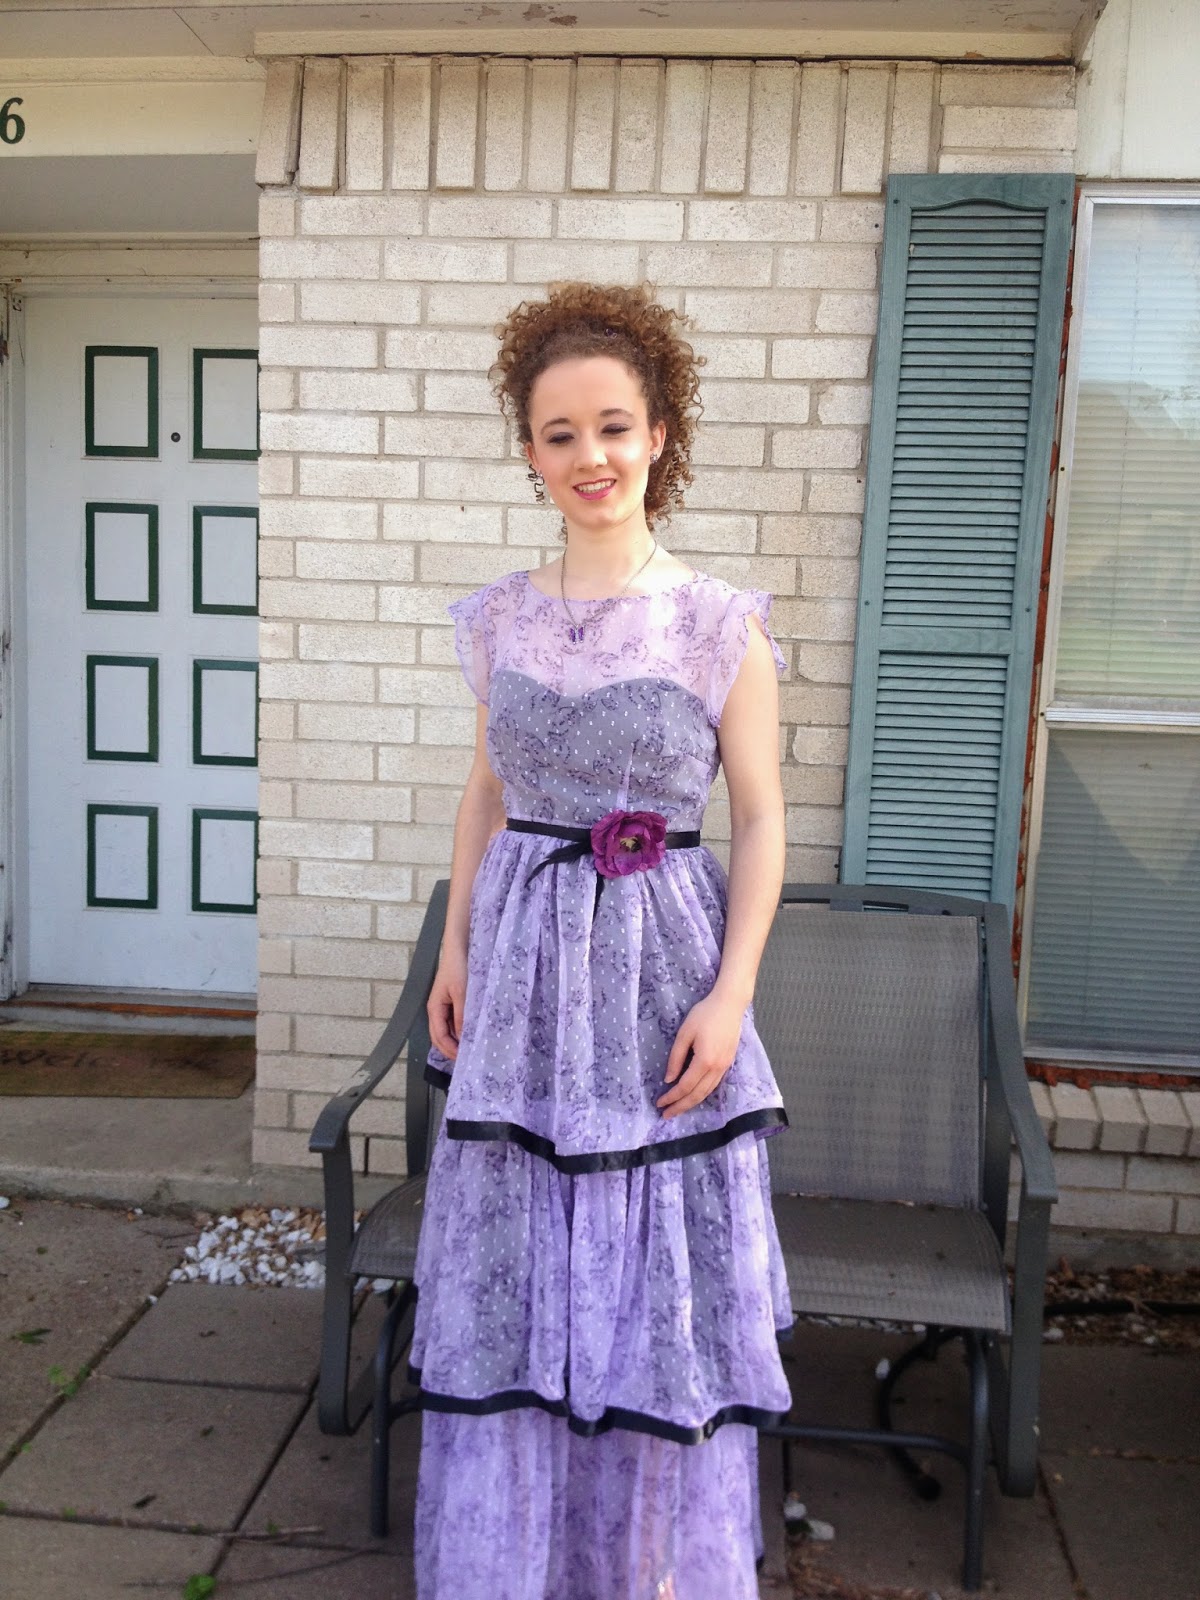
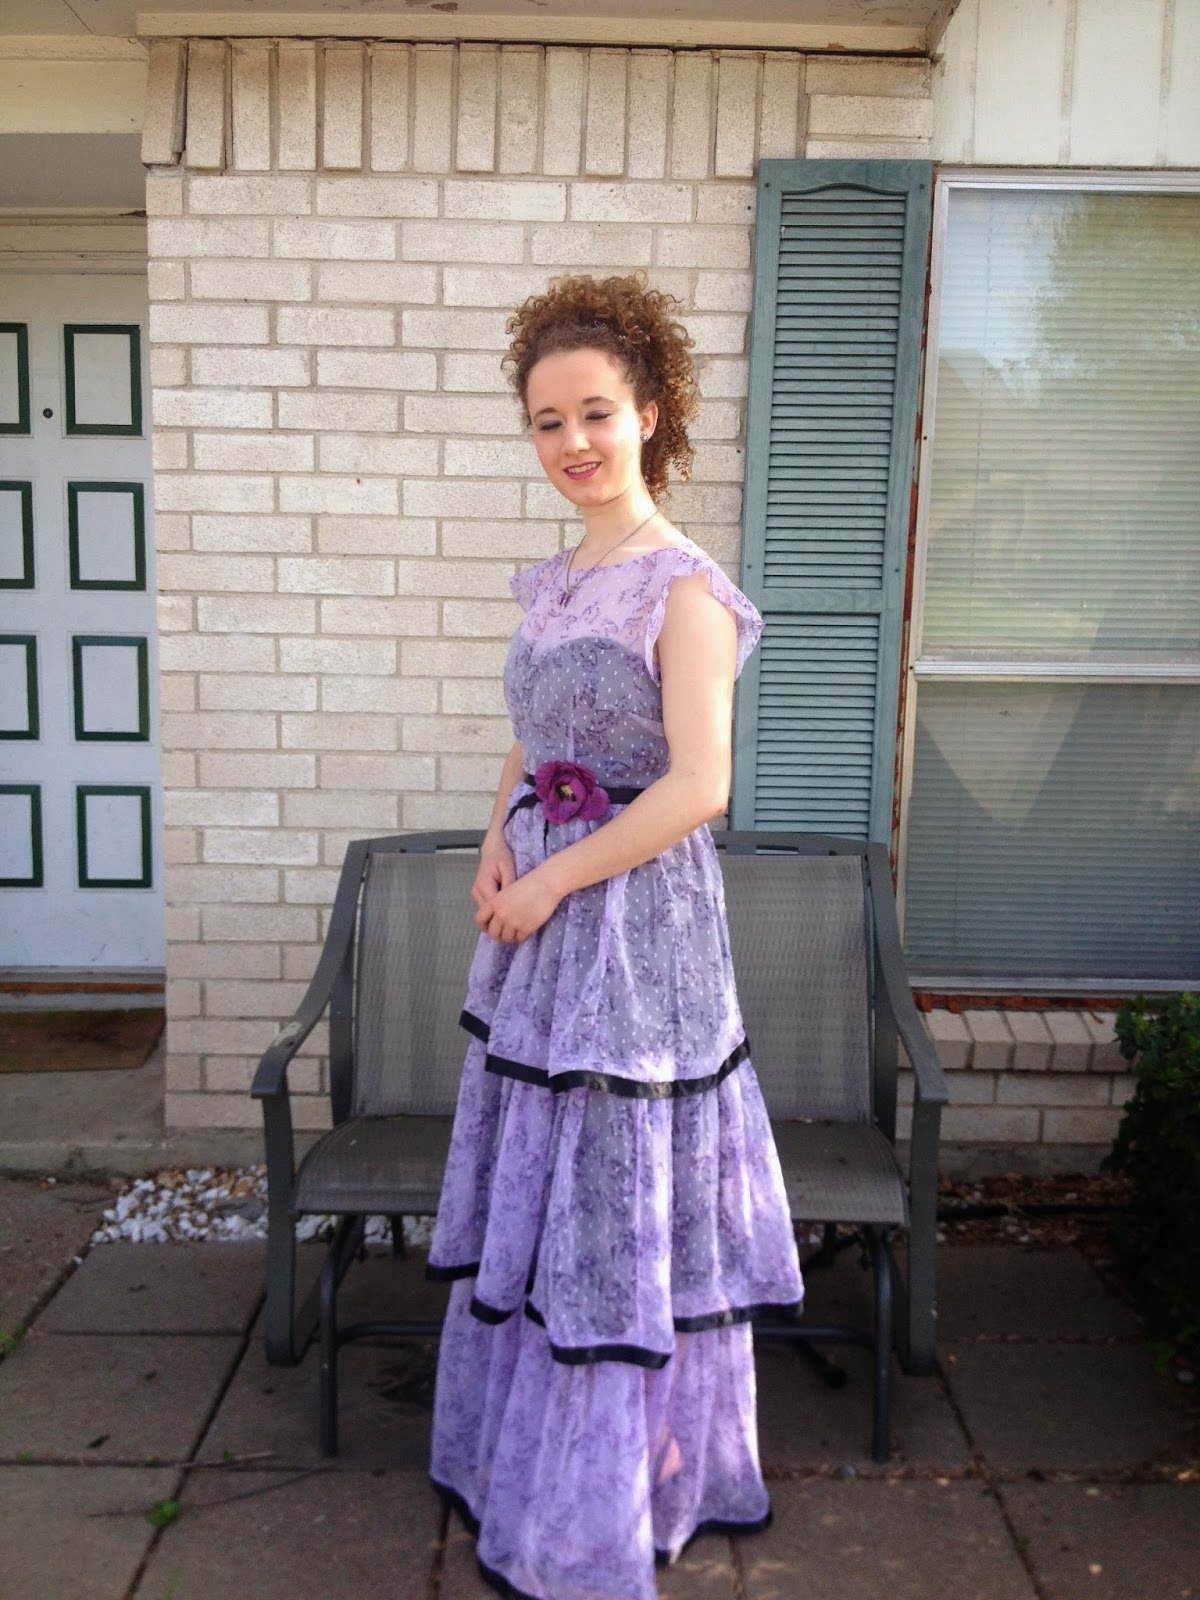
    Between homework, Scouts, church, school, work, and life in general, I actually ended up finishing my daughter's dress the day of prom. I know, cutting it close. But it turned out beautiful!!!! She loved it and received plenty of compliments on it. She loves the fact that she can basically design her own dress and Mom can make it happen. I am in the process of teaching her and her sister how to do it for themselves now, because much to my dismay, they will eventually move out and need to know how to do this for themselves. Anyway, here are pictures of the finished project and my gorgeous daughter in her dress. Hope you enjoy.
 
 
I do not have a serger so I use pinking sheers to finish the edges of the fabric. This stuff will fray like nobodies business.

 
This was the drape of the fabric as I started gathering, and gathering, and gathering, ....you get the idea.

 
She decided on a black satin ribbon for the edges of the layers so you could appreciate yhe black underneath and distinguish the individual tiers of the skirt.

 
Hair done, all ready to go.

 
She chose the flower for the waistline. It is one that is detachable and can be pinned on or clipped in your hair.

 
See what I mean about skinny mini. But a gorgeous one!


All in all this dress turned out perfect for my girl and I am pleased with it. Even though she will probably never wear it again. (sigh) But, that's what prom dresses are for.